

Tips for installing your homemade copper shingles
(FOX 2) - This week, our Jill of All Trades, Jill Washburn, shows us how she installed the copper shingles that she made from scrap copper last week. It's really not difficult, but Jill says there are some things that you need to know.
First and foremost, the copper cannot touch any other metal. So, if you've got aluminum covered trim, or steel roofing nails, or galvanized nails, or some other kind of metal used in the construction of your roof, you need to put a barrier between that and the copper shingles.

Installing copper shingles with Jill of All Trades
In this episode of Jill of All Trades, she shows us how she installs the copper shingles that she made last week from scrap copper.
For the roof that Jill worked on, they used ice and water shield and a rubber flashing with adhesive on the back to cover the roof before the shingles went on. They also used a small plastic molding at the top of the trim board to separate the aluminum covered trim from the copper drip edge. This is necessary because when copper touches any other metal, a call causes a galvanic reaction, which shortens the life of both metals. So, to extend the life of the copper shingles and the construction materials, they put barriers in between.
Also, for the exact same reasons, you should be using only copper roofing nails to install the copper shingles. Jill used 1 1/4" copper roofing nails on her project.
The next thing Jill says you should do, is lay out your shingles ahead of time, meaning figure out where your rows are going to go and draw lines on the roof planning them out. That way, as you work your way up the roof, you can make sure that your rows are staying straight. If you don't draw it out, you risk having the rows get off line, and the roof won't look as good as you progress toward the top.
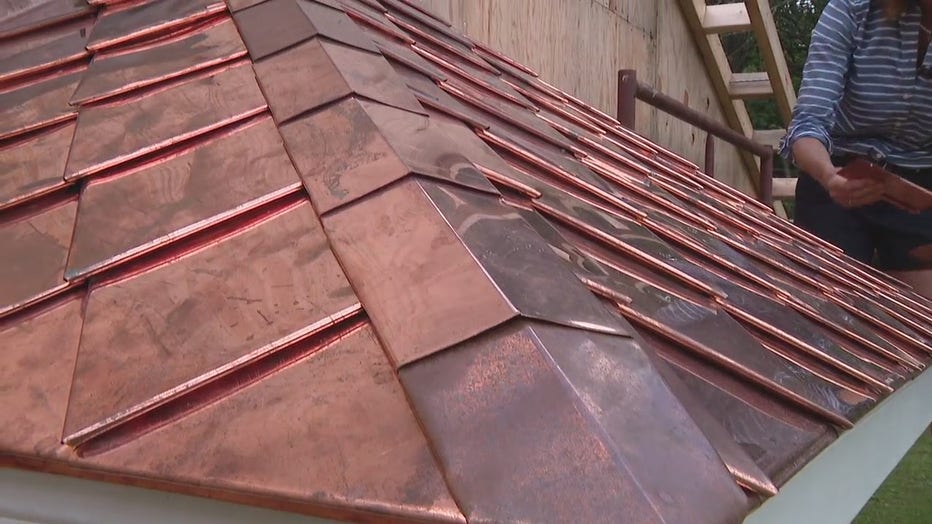
As with any roofing project, you're going to start at the bottom, at the drip edge and work your way up. So, you start with your starter half-shingles, clipping the bottom edge to the drip edge and then nailing them in. Once that row is done, you'll start on your next row, which will be the full size shingles. If that row butts up against the wall of your building, you'll have to use a flashing piece which is basically half a shingle cut vertically with a flange to act as flashing on the side of the building. From there, you'll use your full size shingles the rest of the way across.
Make sure, says Jill, to that the edges are clipping together as you install the shingles. The bottom of the shingle should clip onto the top of the shingles in the previous row. Also make sure, says Jill, that you are nailing on your pre-drawn lines, or as close to them as you possibly can.
Jill says that you'll get the hang of it all pretty quickly and you'll be shocked how fast it is to install these shingles. Your last row of shingles may need to be trimmed at the top. Once you get all the way to the top, you're done shingling.
The roof that Jill worked on had hips, so some shingles had to be trimmed when they got to the hip edge. Jill says not to worry about overlapping the shingles at the hip. There is a special piece that is made for covering the hip. In fact, once she made her way all the way up to the top of the roof, the last thing she did was come back and cover the hip.
Like the rest of the roof, you'll start covering the hip portion at the bottom and work your way up. The first piece will overhang the edge of the roof a tiny bit and then those corners will get folded under. After that, you'll just slightly overlap the hip pieces like a normal shingle and work your way up the roof, nailing them in one at a time.
Like the last row of shingles, you may need to trim the last hip piece at the top. After that, you should be done. You won't believe how beautiful a roof made out of scrap copper can be.
Pattern pieces for this project can be found at basiccopper.com or you can contact Jill directly at jill.washburn@Foxtv.com.
For this projector, you only want to use 22 mil or 16 ounce roofing copper. You can find that at roofing supply stores, the basiccopper.com website, or often at scrapyards. Jill's friend, Jim, was recently able to trashpick a large amount of roofing copper. You just have to keep an eye out for it.
Sometimes, construction crews just throw away the excess after a job is done. More likely, they will take it to a scrapyard to salvage a few bucks. Jill recommends checking with scrap yards to see if they have what you would need. So, a copper roof doesn't have to cost a fortune.
RELATED: How to make your own copper shingles out of scraps
PROJECT RATING: Medium +
More time-consuming than difficult, and it will most likely include working up on a ladder or scaffold.
To watch Jill take you through the installation process, just click on the video player above.