

How to make your own copper shingles out of scraps
(FOX 2) - This week, our Jill of All Trades, Jill Washburn, shows us how to make copper shingles out of scrap copper.
This is a great project to do if you have a small area of roof that you want to accent, perhaps over a bay or box window, or on a cupola, or for a small gable over a door.

Making copper shingles with Jill of All Trades
In this episode of Jill of All Trades, she shows us how to make copper shingles out of scrap copper.
Jill was able to make the shingles she did out of scrap copper. What she got was roofing gauge copper known as 22 mil or 16 ounce. Because this copper came from a scrapyard, it was considerably less expensive that buying from a normal supplier. In fact, it was probably only 10% of the cost that copper this gauge would normally be. Buying this way most likely means you'll be getting smaller pieces, but that's not a problem for this project.
You can find guidance on patterns for making these shingles on a website called basiccopper.com, or email Jill at jill.washburn@foxtv.com. You'll want to cut your patterns out of card stock or something equally rigid. Jill's patterns were cut from other pieces of scrap metal.
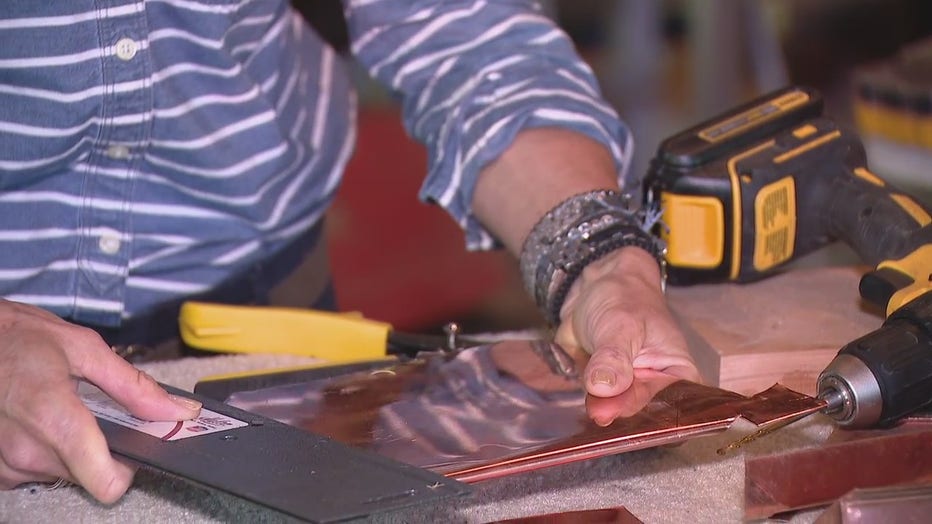
You'll need to trace your pattern onto your copper pieces. Jill recommends using a super fine point sharpie marker for tracing. Then you'll need to cut them out. Jill used a pair of tinsnips. If your tinsnips are sharp, she says, it shouldn't be hard to cut out your shingle.
Jill says that you may want to consider wearing gloves for this process, because the edges of your newly cut copper can be sharp.
Once your shingle is cut out, you'll need to fold the edges.
For this, Jill used an 18-inch folding tool. It's basically a flat tool with a groove along each long edge. One edge allows you to do a 3/8-inch fold. The other edge is for a 1-inch fold. For this project, Jill used the 3/8-inch side.
The newly-cut shingle will basically be a diamond shape with a small tab at the top. Jill says that you'll need to fold the two edges at the bottom of the diamond under with the folding tool.
To do that, you simply insert the cut edge into the 3/8-inch groove and use the tool to fold it over as far as it will go. You'll do that with both of the sides on the bottom half of the shingle. You'll do the same process with the two edges at the top of the shingle, but you'll fold those over, instead of under. So, when you are done, the front of your shingle will have the two bottom edges folded away from you and the two top edges folded toward you. This is so the shingles will interlock when you install them on the roof.
You'll most likely need a whole bunch of these to complete your project. Jill says it's the kind of thing that you could do sitting in front of TV, cutting out and folding until you accumulate enough pieces to do your project.
The last step in manufacturing the shingles is putting a hole in the top tab. You could just punch it through when you are nailing the shingles to the roof, says Jill. But, she cautions, you risk denting or bending the shingles. Jill chose to drill a small hole in the center of the tab so that the work will be easier once she gets up on the roof to install the shingles.
There is a shingle pattern for a starter shingle, which is a half shingle that clips onto the drip edge at the bottom edge of the roof. There is also a pattern piece for a flashing shingle, which is a half shingle that will butt up to a wall, if you should need that. And last, there is another pattern piece that will cap a ridgeline or a roof hip.
None of them are difficult to manufacture, says Jill, but this project does require a bit of a time investment. It's worth it, Jill says. The end result is stunning.
On the next Jill of All Trades, Jill takes us up on the roof to install the shingles.
PROJECT RATING: Easy (for making the shingles). Installing them is more of a Medium+.
To watch Jill take you through the process, just click on the video player above.