Making decorative pumpkins with cement
(FOX 2) - This week, our Jill of All Trades, Jill Washburn, shows us how to make decorative pumpkins out of cement. Jill says you'll need a bucket to mix the cement in, some pantyhose or tights for forming the pumpkin, and some twine or string for shaping the ridges.
Here is Jill's cement recipe:
4 cups Quickcrete quick-setting cement
2 cups sphagnum peat moss
2 cups Perlite
Water

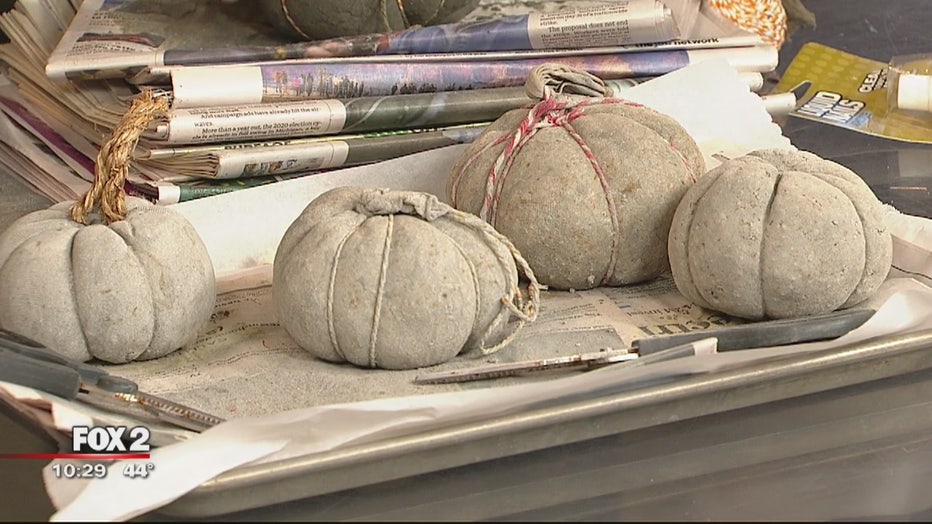
Jill of All Trades makes decorative pumpkins with cement
Jill shows us on The Nine how to make a decorative pumpkin with cement.
Combine all the dry ingredients in the bucket and stir until blended. Then, add enough water to make the cement look and feel like a soft dough.
Once your cement is mixed together, you're ready to fill the pantyhose. Knot the bottom of one of the legs and then start to fill it with cement. Aim for a finished size about the size of a large grape fruit or very small watermelon. Once you have the desired amount of cement in the stocking leg, knot off the top of the stocking and cut the excess off. (Jill got 3 small pumpkins out of each leg of a pair of pantyhose.) Now you're ready to wrap the string.
Take your string and wrap it around the "pumpkin" one time, pulling it tight enough to create a slight bulge in the pumpkin. Knot it at the top. Jill tied the string around 4 times, total, to create 8 bulges or sections in the pumpkin. Tie each one off at the top. You're done. Now you just need to let it dry.
Jill put hers on many layers of newspaper on a cookie sheet. They will need to dry for 3-4 days. Once they're dry, you can cut the string off and peel the panty hose off. Your pumpkin is done! As an option, you can glue a short piece of rope, or braided twine, or even a small piece of vine or stem, to the top as a stem. You can also paint or stain the finished product, or tint the cement. Let your imagination run wild.
PROJECT RATING: Easy
To watch Jill demonstrate the process, just click on the video player above.