

Salvaged Desk Turns Into Nightstands DIY Project Pt 1
This week, Jill Washburn, our Jill of All Trades, shows us how she gave new life to an old desk that she found on Facebook Marketplace.

A Salvaged Desk Find New Life as Jill Turns It Into Nightstands Pt 1
Jill Washburn takes an old desk, purchased off Facebook Marketplace, and turns it into nightstands.
The issue at hand is that Jill needed new nightstands. The problem is there is not much room to accommodate a nightstand in Jill's room, so any nightstand she finds has to be small. It was nearly impossible to find nightstands in the size that she needed that had enough storage, so... Jill decided to make some.
Fortunately, she was able to find a desk on Facebook Marketplace that had two narrow stacks of drawers with a top across them. It was the right style and the perfect size for Jill's project.
Jill started by flipping the desk over on her work bench and removing the top. It was fairly easy, as the top was held on by several screws. Once the screws were undone, the desk was free from the top, but the two stacks of drawers we're still connected by a single piece of trim. Jill was able to easily cut through that with a mini hacksaw. That left the drawer stacks completely separate from one another.
There was still more work to do, however. With the pieces now divided from one another, Jill turned her attention to the top, which is going to have to be cut down into two smaller tops for the nightstands. In order to fully understand what she was working with, Jill had to remove the decades-old contact paper that had long ago been applied to the desk top. It was completely bonded onto the top.
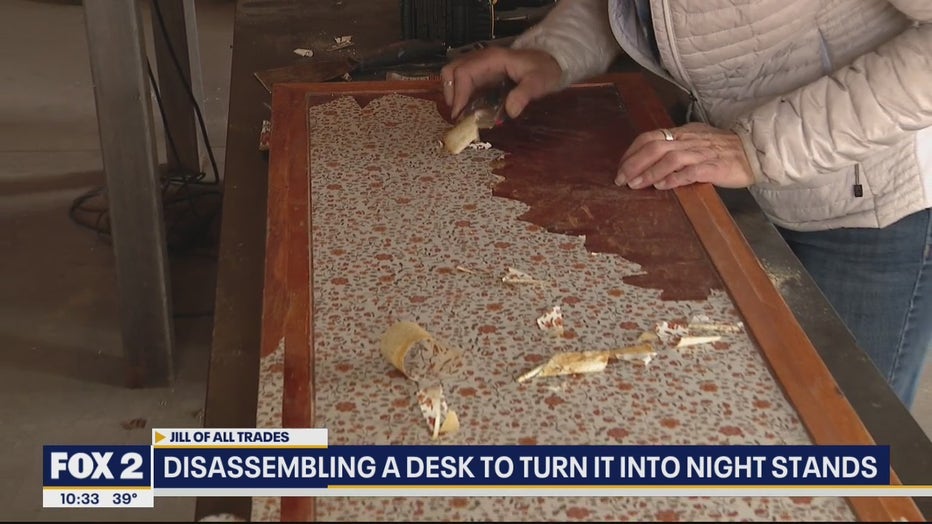
Jill removes the contact paper that was bonded to the desk top.
Jill tried various scrapers. All of them gave very limited results. Then she tried a razor blade, which worked better, but was leaving some gouges in the top. Then, cameraman John gave Jill the perfect solution. He suggested steaming it off. Genius!! That was the answer. The steamer softened the old and brittle contact paper and loosened the adhesive, so that it peeled right off. What would’ve taken hours was reduced to minutes with the use of the streamer.
Problem #1… solved! Thanks, John!
Next up? Problem #2… removing the trim from the edges of the top. Originally, Jill had thoughts of preserving the trim with the hope of reusing it on the nightstand tops. She was trying to keep the pieces as original as possible. But, no matter how she figured it, she was going to end up a few inches short.
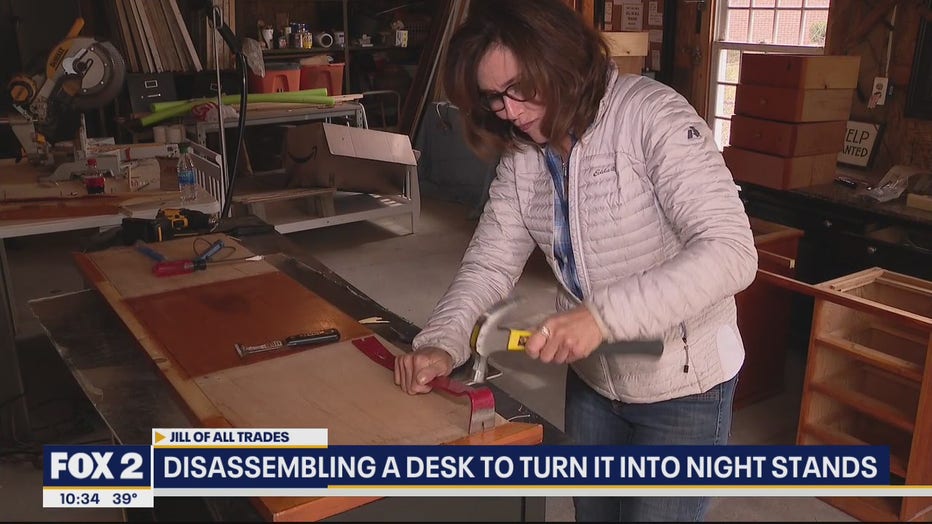
Jill disassembles the desk as she prepares to turn it into a pair of nightstands.
Jill decided that replacing the trim would be the best option. Good thing! Because the desk was so well-built, Jill had to use a pry bar to get the trim pieces loose. The trim was fairly difficult to remove and much of it ended up getting damaged in the process. There was no way she could’ve re-used the trim pieces. Sometimes, says Jill, it’s best to just scrap some pieces and replace them.
So, the desk, on its way to being nightstands, is now taken apart. It’s time to start the rebuild. Jill will start tackling that in the next segment.
PROJECT RATING: Medium
To watch Jill take you through the process, just click on the video player above.