

DIY Fixes For a Trash-Picked and Weathered Old Bench

Roadside Rescue Wooden Bench Rehab
Jill of All Trades pulls a weathered bench from a neighbor's trash and gives it new life.
This week, our Jill of All Trades, Jill Washburn, rehabs a bench that she found along the side of the road in someone’s trash. It is a classic workshop bench, says Jill. She says that you can tell that it was well-made, but that was obviously a long time ago. Clearly, it has seen years of service, and a little bit of abuse. It’s not irretrievable, though, according to Jill. It’s still able to be rescued, rehabbed, and put back to use.
The first issues that had to be addressed with the bench, Jill says, are the cracks in both legs. To address those, Jill had to remove the horizontal braces on the inside of each leg. Once those were removed, Jill was able to assess the cracks in the legs and start working on repairing them.
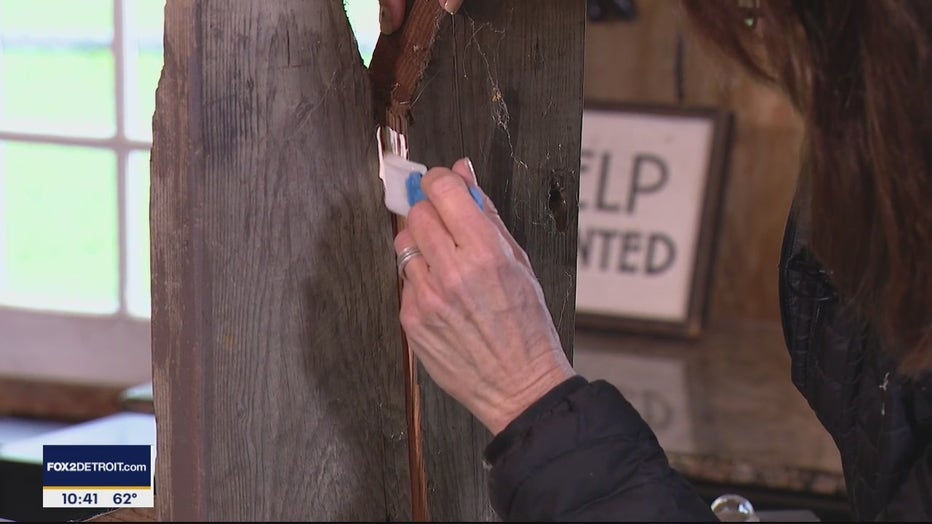
I brushed as much glue as i could into the cracked legs
Jill decided the best repair was to open the cracks as much as possible and then liberally apply Gorilla Wood Glue along each side of the crack. Rather than trying to squeeze the glue into place, Jill poured some into a small cup and then brushed it into the crack, making sure to coat each side that was to be glued together.
Once the glue was in place, Jill help the pieces together with a clamp. To help distribute the force of the clamp, Jill put a piece of scrap wood along each side of the leg. That way, the clamp would help hold the entire leg together, instead of concentrating on just one spot. When the glue begins to squeeze out of the crack, you’ll know you’re getting it tightly back together.
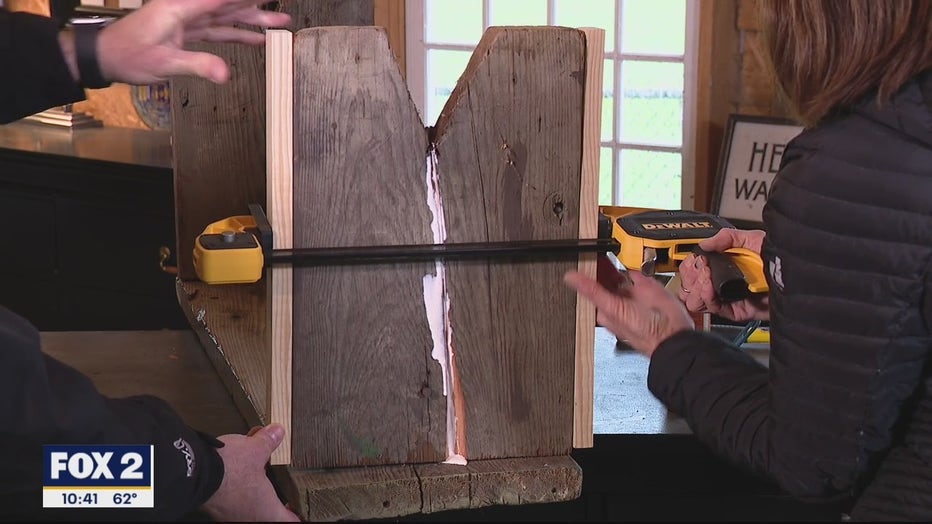
The legs had to be clamped while drying.
While waiting for the glue to dry, Jill took the opportunity to patch some of the large deep holes on the top of the bench. She used Durham’s Water Putty for that, mixing it with water in a cup and then filling the holes. Jill left the numerous small holes unfilled because she likes the "rather beat-up" look of the bench.
When the filler was partially dry, Jill took a putty knife and leveled off the excess filler on the big holes. Then, she used the edge of the putty knife to put fine grooves in the patches on the big holes to mimic a wood grain texture. That will give the top of the bench a more uniformed appearance once it’s painted.
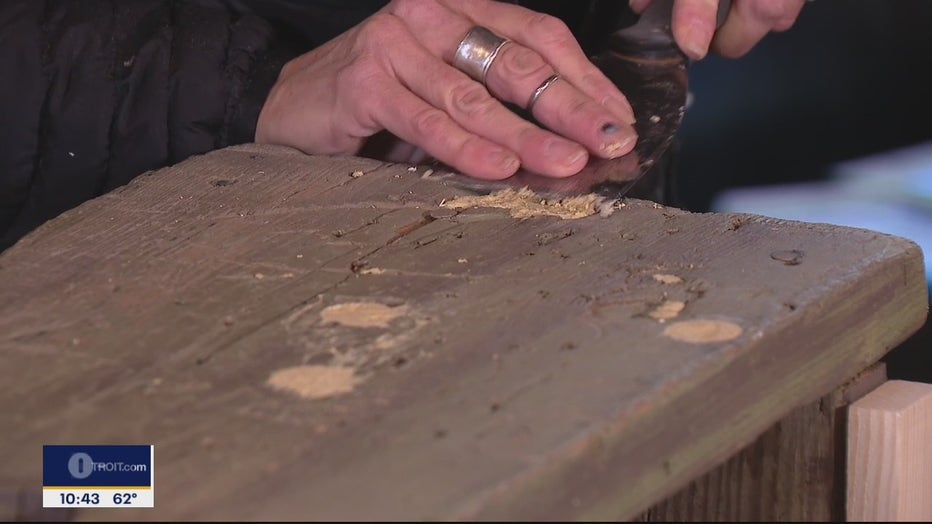
I'm scraping off the excess filler, to save myself some sanding later on.
Now, we’ve got to let everything dry, says Jill, so it’s a good point to stop for the week. We’ll pick up next week with bracing the legs, so they’ll be rock solid, and stay that way. Then, we’ll finish it off with some paint.
We’re halfway done with this roadside rescue!
PROJECT RATING (so far): Easy +
To watch Jill guide you through the process, just click on the video player above.