

How to cut and hang your siding
(FOX 2) - This week, our Jill of All Trades, Jill Washburn, continues with her siding project. With the prep work done, it’s time to hang the first piece of siding.
One of the first things you need to know, says Jill, is that siding expands and contracts with the weather so you have to allow for that when you measure and cut your siding pieces. That means that, unless you’re hanging your siding on a super-hot day, you need to cut it just a tiny bit shorter than the full measurement from the deepest part of the J-channel at one end to the deepest part of the J-channel on the other side. Leave just a tiny bit of space at each end, maybe a quarter inch or so. You want the J-channel to easily cover the end of the siding, but have a little room for expansion.

Jill of All Trades cuts and hangs siding
In this episode of Jill of All Trades, she shows us how to cut and hang your own siding pieces.
At the same time, you have to plan for contraction in the coldest weather, so if you’re hanging siding when it’s really warm, you’ll want to keep in mind that the length of it is going to shrink a tiny bit in the winter.
Once you figure out your measurements, it’s time to cut the siding. Jill says that you can do this with a miter saw, a skill saw, or even some tin snips. If your tin snips are sharp, you’ll be shocked, says Jill, how easily they will cut through vinyl siding. Jill cut her siding with a skill saw.
**PRO TIP** If you’re using a saw to cut your siding, take the blade off, turn it around, and reinstall it backwards. Making the saw blade a little less aggressive will make it less likely to shatter or crack your vinyl siding while you’re cutting, especially if you’re working on a cold day when the siding will be less flexible/more brittle.
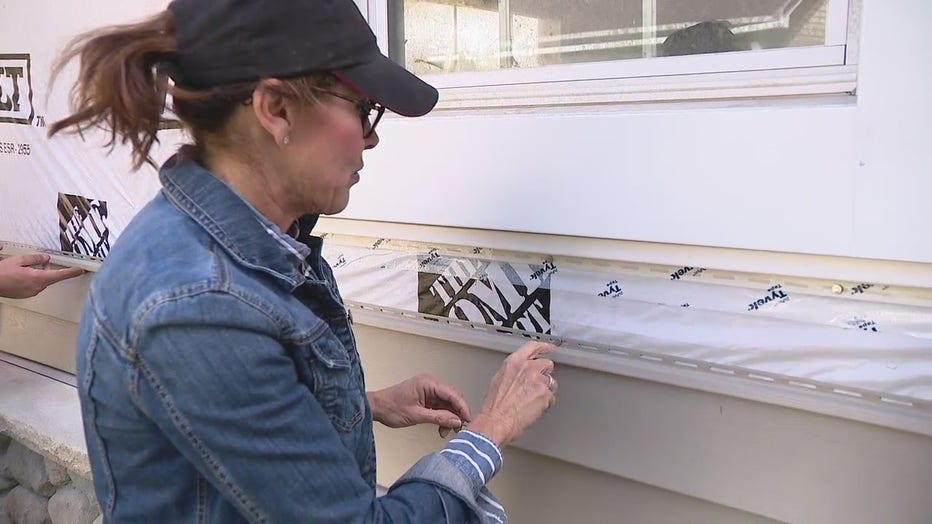
Once you’ve measured and cut your siding piece, it’s time to install it. Start by fitting it into the J-channel. When you have that in place the way that you want it, leaving room for expansion/contraction, you’ll then want to make sure it’s clipped onto the starter strip at the bottom. You should be able to feel it engage, says Jill. It’ll kind of snap on and when you pull up on the siding a bit, you’ll feel it clip on. It should stay clipped on once it’s engaged. Next, it’s time to nail it on.
Jill recommends starting with your first nail class in the middle of the length of the piece. She gives the siding a quick tug up, just to make sure it’s where it should be and then she nails it at the top. The nail holes at the top of the siding will be slots. Jill says to aim for nailing in the center of the length of the slot. As with the J-channel, the nail should not go all the way in, tight to the wall. It should be in, but just loose enough for the siding to slide ever so slightly. Again, you have to allow for movement with the temperature changes.
With the first nail in place, you can nail down the rest of the length of the piece. The nails should be no more than 16” apart. Many full-size contractor hammers are 16” in length. If yours is like that, it’s an easy way to measure your way across the wall. Jill’s hammer is smaller so she chose a different way to measure. The slots at the top of the siding are at 2” intervals, on-center. So, Jill just counted every eight slots and nailed that way.
If your pieces aren’t long enough to cover the length of your span, you’ll need to piece them together. They should overlap a bit, again keeping in mind that there will be expansion and contraction over the course of the year.
**PRO TIP** If possible, try to determine the angles from which that wall of the house is most likely to be viewed and overlap the siding so that the cut edge faces the other direction, away from your viewing angle. This will make the seams less visible. Also, make sure any seams you have are staggered. You DO NOT want the seams to line up as you look up the wall. Staggering them makes them much less obvious.
Once your first siding row is in place, you can start the second row. Each row will clip onto the top of the previous row, just like the first row clipped onto the starter strip. At some point, you will likely have to work your way around doors, windows, or other architectural elements. Also, you’ll need to know how to finish it, when you get to the top of the wall. Jill will guide us through those issues on the next Jill of All Trades.
In the mean time, if you’d like to watch Jill take you through the siding process, just click on the video player above.
PROJECT RATING: Medium