

How to prepare to put on your own vinyl siding
(FOX 2) - This week, our Jill of All Trades, Jill Washburn, shows us that we can do our own vinyl siding on our house or garage. Like most successful projects, she says, the prep work is key.
The first thing you'll want to do, says Jill, is cover your plywood sheathing with house wrap. House wrap is a breathable synthetic fabric that lets water vapor out, but blocks water drops from getting in, so moisture won't get trapped behind your siding. It's great protection for your structure and it's not hard to put up.

Jill of All Trades preps for new siding
In this episode of Jill of All Trades, she shows us how to prep your house or garage to put on your own new vinyl siding.
You'll need to stretch the house wrap across the wall that you're working on and staple it into place with a hammer stapler. It goes up quickly and it doesn't have to look perfect or pretty, because it's all going to get covered up anyway. Once you've covered the entire span, you can tape any seams shut. You may also need to tape the edges of the house wrap to the plywood. It's all super-easy to do.
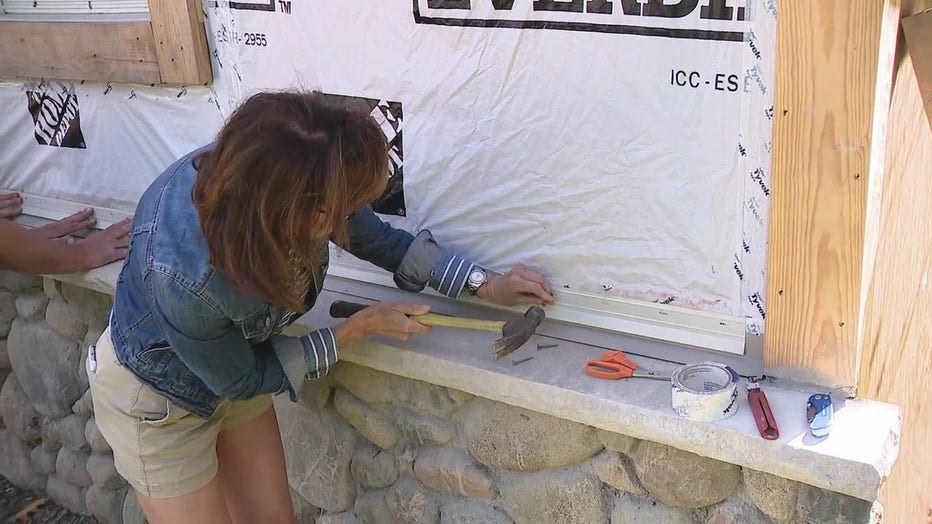
With the house wrap done, it's time for the starter strip.
The starter strip is a little aluminum strip that should be nailed to the bottom of the wall so that your first row of siding can hook onto it.
The main thing here is to make sure that the starter strip is as level as possible. If your starter strip is off-level, your siding will be off-level all the way up the wall.
Also make sure, says Jill, that your starter strip is level and in line on both sides of things like doorways, chimneys, etc. If it's not, it could make things difficult as you work your way up the wall. You may want to snap a chalk line to make it easy to keep the starter strip level as you go down the wall. Starter strip should be nailed tightly to the wall, with the nails no more than 16" apart.
Next, you'll need to hang the J-channel.
This is the edging piece that goes around things like doors, windows, trim work, etc. Anywhere that a row of siding would stop, there should be J-channel to cover the cut ends.
Like the siding, itself, J-channel comes in many colors. Jill says that some people match the J-channel to the color of their trim. Others match the siding. Jill usually matches it to the trim color because it adds and extra line and dimension to the trim. This type of thing though, is really just personal preference.
Also, Jill advises that the J-channel should NOT be nailed tightly to the wall. The proper way to hang it, says Jill, is to nail it in the center of the slots at the top and space your nails no more than 16" apart. When you're done, you should be able to slide it back and forth ever so slightly, so that it can expand and contract with temperature changes throughout the year.
Jill says that the J-channel cuts easily with a good pair of tin snips. She does warn, though, that the vinyl gets slightly more brittle in cold weather, so if you're working in cold temperatures, be a little more careful when nailing. A missed hammer strike could crack or even shatter your J-channel.
When hanging the J-channel, Jill says to "think like a raindrop." You have to think about how water will shed down the side of the house.
The J-channel over things like windows and door frames should extend a bit over the J-channel pieces that go down the sides of the windows or doors. Then you'll want cut a tiny flap on the bottom of the J-channel on the top and fold it down over the side pieces. Doing this will ensure that any water that ends up in that top piece will shed down the sides properly and won't end up running behind the siding. Jill shows how to do this in the video above.
When your house wrap and starter strips and J-channel pieces are in place, you're ready to start the actual siding. Jill will get us started with that on the next episode.
In the meantime, if you'd like to watch Jill take you through the prep steps to for vinyl siding, you can click on the video player above.
PROJECT RATING: Medium