

The Salvaged Desk Turned Nightstands DIY Project Part 3

The Nightstands From a Desk Are Finally Finished!
The nightstands made from an old desk make it to the finish line! With a few finishing touches, and new paint and hardware, you would never guess what their previous life was.
This week, our Jill of All Trades, Jill Washburn, takes us through the finishing steps on the nightstands that she made from cutting an old desk in half.
First order of business was to fill the holes and marks left from screws, nails and previous damage. Jill used one of her favorite go-tos, Durham’s Water Putty. She just mixed the powder with water until it made a thick paste. She then pushed the paste into the holes and gave it time to dry. Durham’s dries quickly so, within several minutes, she was able to scrape away the excess and then hit it with the sander so that the surfaces were flat and smooth.
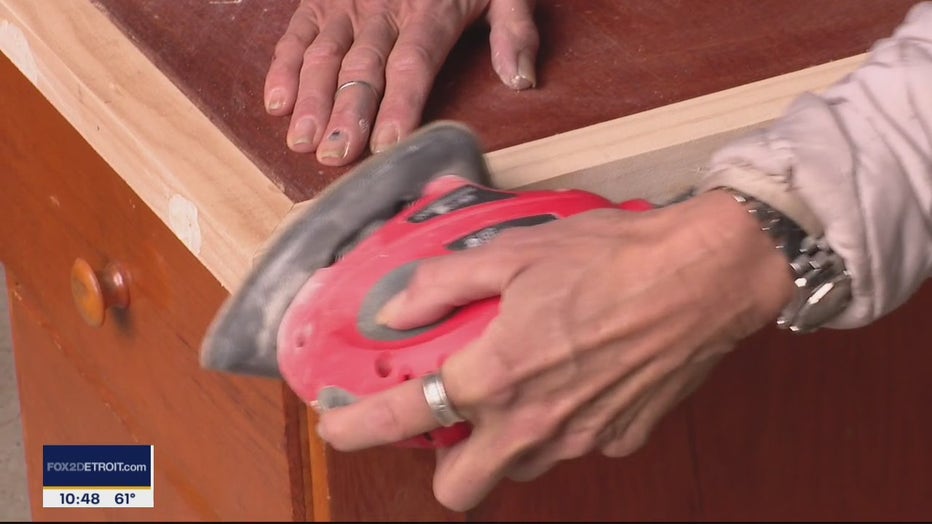
I gave the filler that patched the screw holes one final quick sanding.
While Jill had the sander out, she quickly gave the new nightstand tops a sanding. They still had some crusty adhesive left over from the old contact paper that had been removed, so she needed to grind that off. When that was done, she removed the old knobs from the drawers and used a foam sanding block to give the drawer fronts a light scuff. Her goal was to dull the shiny finish just a bit. That will help the new paint stick easier.
When the sanding was finished, Jill took out another one of her old stand-bys, the diaper wipes, to wipe down the surfaces and remove any sanding dust. If you’re really picky, Jill says, you can use a tack cloth but Jill says a good, old diaper wipe is easier to use and works well enough for her.
With the filling, sanding, and wiping down done, it was time to paint. Originally, Jill was going to paint these pieces blue to match an antique dresser in the same room, but she decided that getting a new blue paint to match a weathered antique finish might take a frustratingly long time. So, she changed her mind and went with white.
Jill used Rustoleum’s Universal spray paint in satin finish white. It covers really well and gives a very professional finish. That said, it took two good coats, plus some touch-ups, to get the nightstands looking good.
As the paint was drying, Jill turned her attention to the back of the pieces. She wanted to be able to charge her phone and accessories in the top drawer of the nightstand, so she drilled a hole in the back of the nightstand, behind the top drawer. Now, she could thread her charging cords through the back of the piece and into the drawer. That way, the tangle of cords that placed her previous nightstands could be out of sight. Bonus... no more phones getting knocked off the nightstand. Depending on your piece of furniture, says Jill, you may have to drill a hole in the back of your drawer, as well.
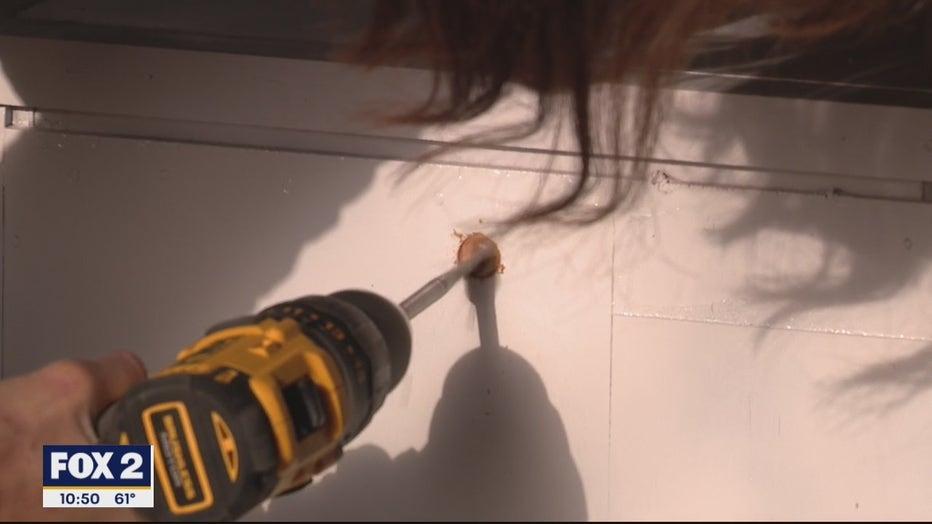
I drilled a hole in the back for my phone charging cords.
Jill says that she could have even done a slightly bigger hole and then installed a power strip inside the drawer. That way, only a single cord would be coming out of the piece. And, depending on how your piece is constructed, if you had enough excess room behind the drawers, you may choose to drill you hole for the cord/cords closer to the bottom of the piece so that the cord exits the piece closer to the floor. There are many ways that you could do it, says Jill.
The last step was to replace the old wooden knobs that Jill thought were a little too small with new metal knobs in an aged pewter color. Jill says that the knobs and hardware are the "jewelry" of any piece of furniture and having the right hardware can really enhance the look of a piece.
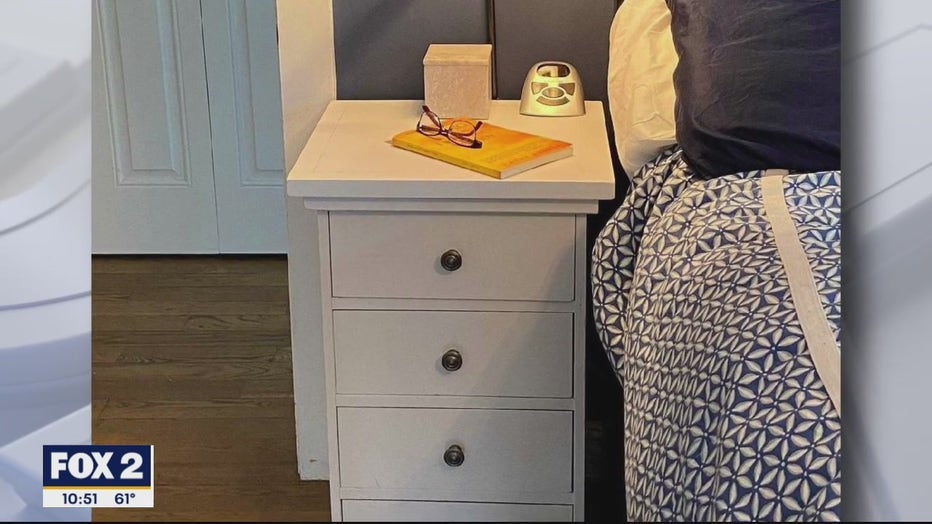
Here's the finished nightstand in its new home!
So, the unwanted desk is now a pair of nightstands that Jill loves. They look great, and will now get many more years of use.
PROJECT RATING: Medium
To watch Jill take you through the process, just click on the video player above.
To watch the previous segments of this project, check out the rest of the Jill of All Trades section on Fox2Detroit.com.