

Jill of All Trades: Tips for safely changing out your tire
This week, Jill Washburn, our Jill of All Trades, shows us how to change a tire. Recently, Jill was driving her vehicle and hit a small piece of debris in the road and heard a loud bang. Obviously, that wasn’t something good. Immediately, the tire sensor started alerting her that the pressure was low.

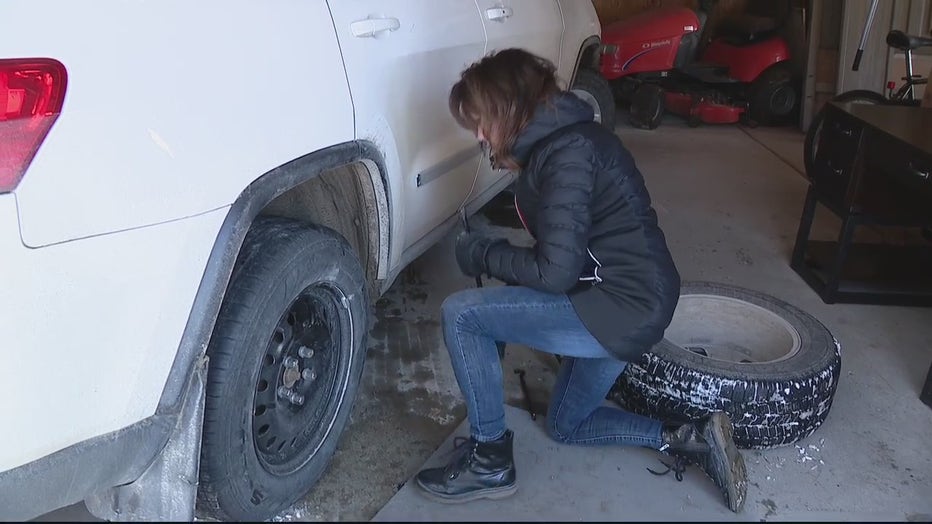
How to change a tire
After recently experiencing a flat tire herself, our Jill of All Trades shows us how easy it is to change your own tire.
Jill was lucky that she was able to make it about another half mile down the road to a safe spot in a parking lot before the tire went pancake flat. That may not always be possible, so Jill wants to emphasize some safety tips. First and foremost, she says, you want to be well off the road. Next, you want to be in a safe area. If it is dark, or bad weather, or not a safe area, or too busy of a spot, you probably want to call for help.
Next, Jill says to check your terrain. You want it to be level, or as level as possible. Also, Jill says, if you can, block your wheels to keep the vehicle from rolling, do so. If you’re working on the front, block the rear wheels, and vice versa. This is not an absolute must. You may not have anything available to do it, but it’s a nice little bit of safety insurance to keep the vehicle from falling off the jack if you’re able to do it.
Now it’s time to get down to business. Pull out your jack and your spare. You may not even know where these are on your vehicle. If you don’t, consult your owner’s manual. If you don’t have that in the vehicle (WHAAAATTT??!!), you can probably access it online on your phone.
The tire changing set-up is different from vehicle to vehicle. It wouldn’t hurt to take a couple minutes before you’re in crisis mode to figure out where your jack is, how it goes together, where your spare tire is, and where the specific place is that you should place the jack to raise your vehicle. If you know those key points ahead of time, you can save yourself a lot of stress when you actually have to change a tire. Those events seldom happen when you have tons of time and helpers available.
Once you have the jack ready to go, hold off on raising the vehicle until you have the lug nuts loosened. Jill says that if you remember nothing else, remember to loosen the lug nuts while the wheel is still on the ground. It’s a whole lot easier and it’s safer to really crank on them if the vehicle is not on the jack. Also, initially, they may not loosen easily. Jill had to put the lug wrench on and kind of step on it or give it a little kick to get the lug nuts to break free. Once they did, though, they turned fairly easily from that point on.
Jill warns to not fully remove the lug nuts at this point, and says that when they are loose enough to turn by hand, you can now jack up the vehicle. Keep in mind as you jack up the vehicle that a full spare is going to require more clearance than a flat tire, so jack the vehicle up a little higher than you need to just remove the tire.
When you’ve got enough clearance, you can loosen the lug nuts the rest of the way and pull the tire off. Jill likes to work back and forth across the hub when removing the lug nuts, so remove one and then remove one on the opposite side and keep working your way back and forth across the tire. Make sure you keep the lug nuts somewhere safe.
With the lug nuts off, the tire still may not want to come off easily. Sometimes dirt and grime will have it nearly sealed on. Jill says a good donkey kick or two with your heel should help it to break free.
With the damaged tire off, you’re ready to place the spare one. If you don’t have enough clearance, adjust your jack. You also don’t want to have the jack too high because that means you’ll just have to lift the spare higher to install it. A spare tire can be surprisingly heavy, especially if you’ve got a pickup truck or an SUV.
Placing the spare can be slightly tricky when it comes to lining up the holes. Jill found that using part of the jack as a pry bar helped her easily lift the tire the last little bit and get it into the proper place. Once it’s on, you can start replacing the lug nuts by hand. Tighten each one as much as you can by hand, again working back and forth across the hub. You may have to repeat this process a couple of times. Tightening multiple lug nuts will then allow you tighten others even more.
When you’ve gotten them all placed and tightened as much as you can by hand, go through the process again with the lug wrench. You won’t fully tighten them, though, until you get the vehicle down on the ground. Now, you can let the vehicle down with the jack. Once it’s firmly on the ground, you can take your lug wrench and really tighten them all again using your full body weight to wrench them on. Once again, says Jill, you want to work back and forth across the wheel hub.
After that, you’re good to go! Don’t forget to grab your jack and your flat tire and toss them in your vehicle. And, you owe yourself a pat on the back for a job well-done!
Last, but not least, if your tire only has a small leak, instead of major damage like Jill’s, Jill says you may be able to temporarily salvage it with a product like Fix-A-Flat or something similar. It’s not necessarily a long-term solution, but it can get you out of a jam or to a better situation where you can better deal with the damage. It’s worth having a can of that in the car for emergencies.
PROJECT RATING: Medium to Hard (depending on your vehicle)
To watch Jill change the tire on her vehicle, you can click on the video player above.