

Creative Affordable Do-It-Yourself Way to Divert Rainwater

Rain Diverting Bumper
Jill of All Trades shows us an easy do-it-yourself way to keep water out of your house or garage.
This week, our Jill of All Trades, Jill Washburn, shows us a creative way to divert water away from a house or garage. Jill’s workshop garage sits at the bottom of a sloping driveway and the recent heavy rains have sent multiple waves of water under the garage door seal and through the garage itself. It was starting to compromise some of her supplies and threatening to ruin some of the furniture pieces she’s saving for future projects.
While replacing the rubber gaskets at the bottoms of the garage doors will be a project for another day, Jill figured that diverting the bulk of the water before it even reaches the garage doors was her first priority. Her first thought was to dig some sort of drain or trench. While that would certainly work, the driveway to the workshop is crushed limestone. It’s been packed down for years and would not be easily dug by hand.
Jill’s next thought was to install some sort of barrier that could be driven over, like a speed bump. Pre-fabricated ones can be purchased, but they can run $15 - $50 per lineal foot. Jill was going to need between 30 and 40 feet, altogether. That cost went way above what Jill was able to devote to this project.
Then, Jill came up with a solution that was easily done, with simple supplies, at a modest cost. That was the answer that she was looking for.
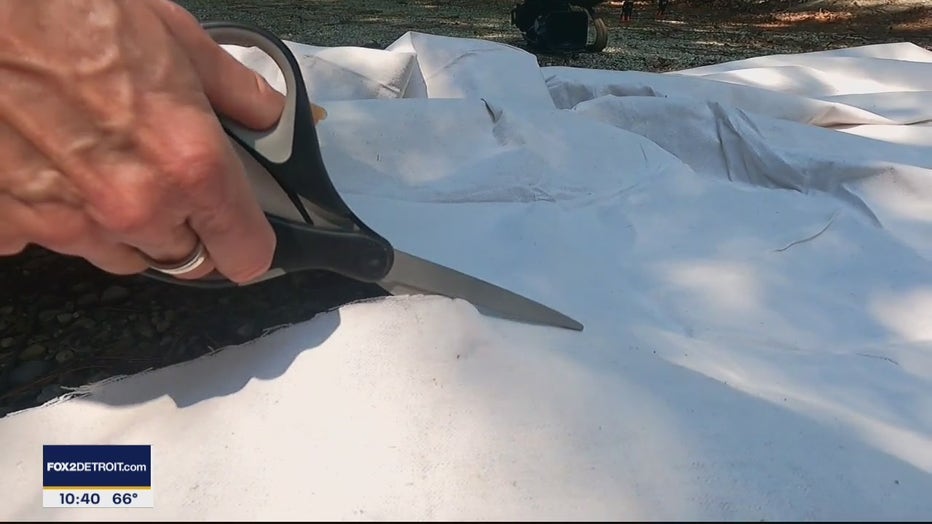
I cut the canvas dropcloth into 18" wide strips.
Jill started with a canvas painter’s drop cloth that she found in the paint department at Home Depot. It cost her around 12 bucks. After that, she only needed a stapler and some sand. Jill already had a pile of slag sand that was left over from another project, and she grabbed the stapler out of her home office.
First Jill laid out the drop cloth and measured out 18" wide strips. She cut them out and laid them across her driveway where she wanted the finished barrier to be. Then she shoveled slag sand down the center of the strips for the entire length of them. She made sure to leave a narrow strip of the fabric showing down each long side.
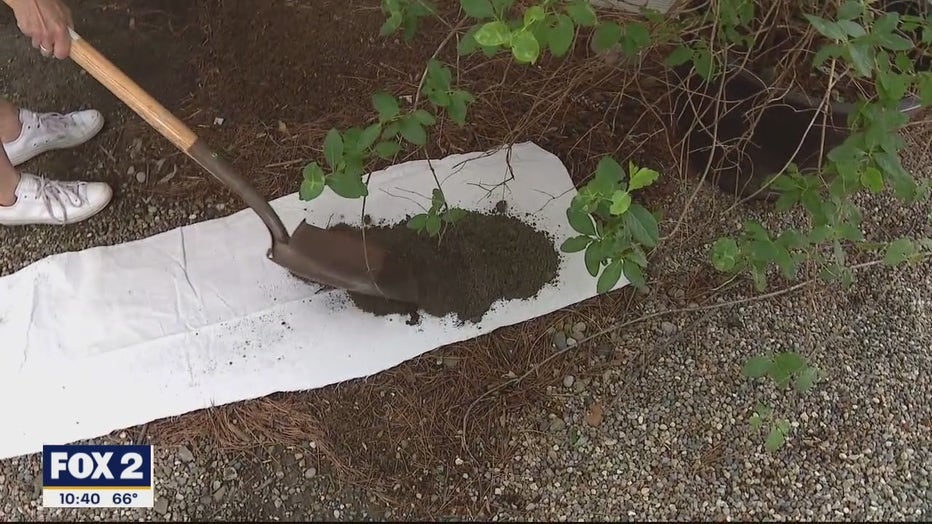
I laid a row of slag sand down the middle of the canvas strips.
When she had the sand on, she folded one long edge of the drop cloth over, lining it up with the other long edge. Then she went along those edges with the stapler, stapling every few inches or so. What she ended up with was a long tube that was filled with sand. Next, Jill rolled the sand-filled tube over, so that the stapled edge was at the bottom and not visible. She folded the ends of the tube under and stapled them closed, as well.
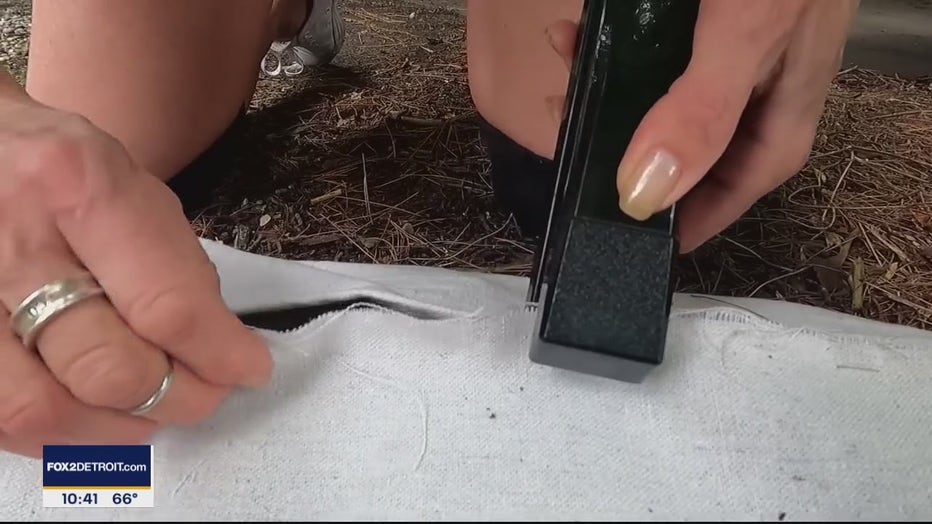
I stapled the long edges together.
Ultimately, Jill made three of these rain bumpers and laid them end to end across the driveway, running at a slight angle so that the water would run along the entire bumper and ultimately be directed to a natural low spot in her yard that was beyond the front of her workshop.
The beauty of this arrangement is that the finished bumper is low enough for a vehicle to easily drive over. Plus, the fabric and sand will easily conform to the contours of the limestone driveway, making it unlikely that water would seep under it. Also, it can be a permanent set-up, or Jill can move it out of the driveway for the winter, so that the driveway can be shoveled or plowed and they can be returned in the Spring to battle the rain once again.
Jill says that this may not be the answer for preventing water damage for every situation, but it has worked really well for her, and certainly it is an affordable option to try.
PROJECT RATING: Easy
To watch Jill take you through the process, just click on the video player above.